Thanks to WordPress and the various free page builders, creating a website is very easy. You rarely require any design skills if you use a ready made theme. With most of the page builders, such as Elementor, changes to the design can be made directly in the builder without the need to write any code. Even the tiniest design modification requires minimum effort because of the accessibility of the design components, which include font color, background color, font size, icons, etc.
However, these builders only provide the necessary and basic design options and doesn’t include everything. So according to requirements, you may need to go back to custom coding.
If you have a background in web development, you would head straight to the theme’s CSS file. But did you know that the CSS file is not the only place to write custom code?
I am going to show you 4 ways to add custom CSS to WordPress.
What is CSS?
The visual page builders may not provide all of the design options you are looking for. In this case, you have two choices:
- Stick with the provided site appearance.
- Get your hands dirty and write the CSS yourself.
I have designed and developed websites for big companies, and I always have to write the custom CSS. Why? Due to page builders styling limitations, a site sometimes needs a more advanced layout and visual appearance, and for that, writing your own CSS code is necessary.
4 ways to add custom CSS to WordPress
There are a few different ways to add CSS to a WordPress website, and you can choose any method you prefer because the output of the CSS will be the same.
Here are the 4 ways to add custom CSS to WordPress. With each method explained below I have also listed the pros and cons as well.
1. Using the themes’ additional CSS section
Almost every theme has a CSS section that allows you to add custom CSS code. Does your theme have this option? You can check this by going to Appearance > Customize.
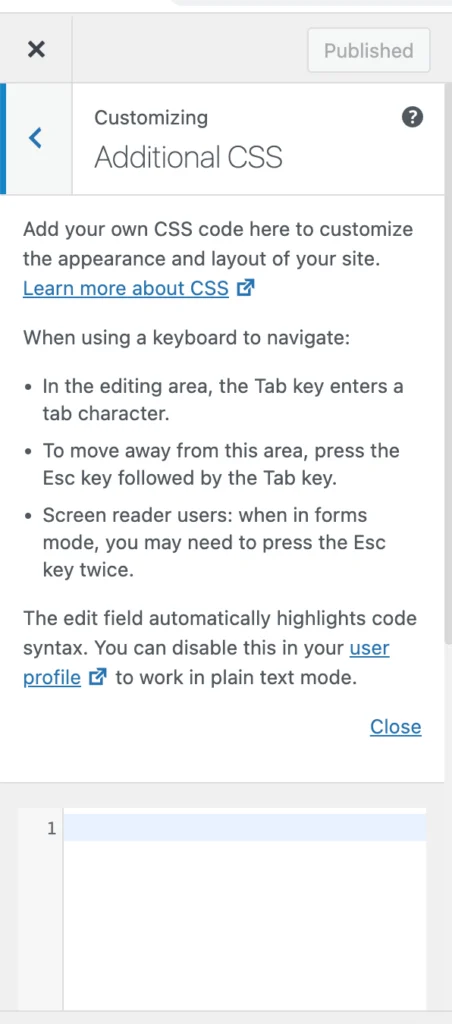
The theme that I am using is Astra, and here is how I can add custom code to the additional CSS section. I go to Appearance > Customize and click on Additional CSS in the left hand menu. Over here, I can add my own CSS code to customize the appearance and layout of the site.
Advantages:
- CSS is saved in the theme customization.
- All of your CSS code is in one place.
- It offers IntelliSense, making it easy to write the code.
Disadvantages:
- Reading and writing the code may prove difficult because the text editor isn’t wide enough.
Whenever you’re satisfied with your changes, click the Publish button to save your CSS.
2. Using the themes’ CSS file
Going back to the “old is gold” way, you can add your code directly in the theme’s CSS file. For this, go to Appearance > Theme File Editor > style.css. Depending on the theme installed, the name of the CSS file may be different, or it could be placed inside a folder.
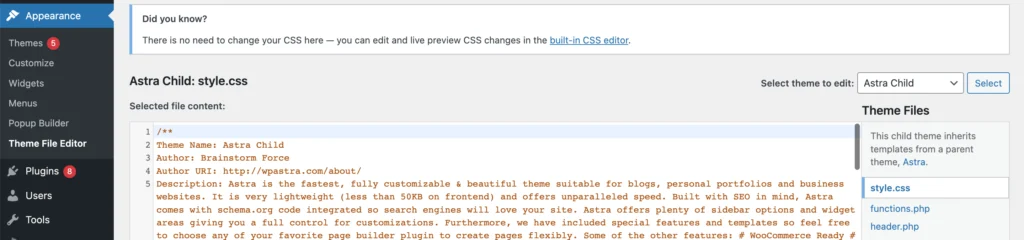
Before you start working in the CSS file, I would recommend creating a child theme because this will allow you to make changes to your site’s code without affecting the original theme files. Also, you won’t lose your custom code when you update your theme to a new version.
Don’t worry; creating a child theme is a simple process. I’ve gone over how to make an Astra child theme in great detail. The steps I have explained in this tutorial can be applied to any theme.
Advantages:
- Incorrect CSS code is highlighted in red.
- All of your CSS code is in one place.
- It offers IntelliSense, making it easy to write the code.
- It provides the look and feel of a real text editor, making it easy to read and write the code.
- You get to create a child theme.
Disadvantages:
- If you forget to create a child theme and update your original theme to a new version, you will lose all your custom code.
3. Using a plugin
Another simple way to write custom CSS code is to install a WordPress CSS plugin. Go to Appearance > Plugins and search for “Custom CSS”. Whichever plugin you install, make sure to review it carefully, check its compatibility with WordPress, and check the number of downloads. These few things tell us how reliable a plugin is.
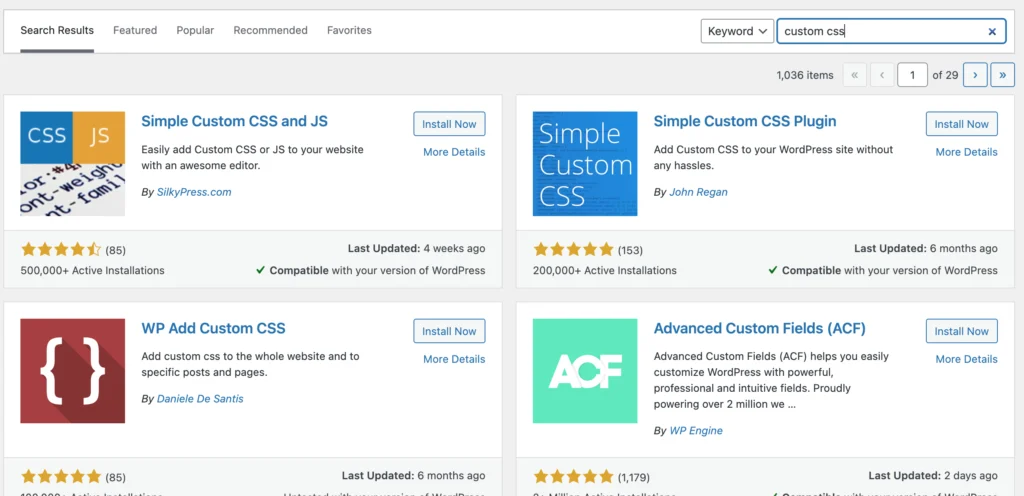
Here is a list of a few popular options that you can consider:
After you install and activate the plugin, it will usually show up as a new menu item in your dashboard.
Advantages:
- All the CSS code will be written in the editor provided by the plugin. You won’t need to access your theme’s CSS file.
Disadvantages:
- Plugins aren’t always reliable. Sometimes hackers make plugins as a way to steal personal information from your users.
- Plugins may cause compatibility issues.
- It may slow down your site, which will hurt your rankings.
Read: 3 reasons how plugins can destroy your site
4. Using the builder
If you are using a visual page builder, such as Elementor, you will not have a dedicated editor where you can write all of your CSS code. The page builder allows you to write CSS code in add-ons that you can drag and drop onto your site.
Advantages:
- You can write add-on specific code. As a result, if you want to update the CSS for a specific section, you don’t have to go through the entire CSS file to find that particular line of code. You simply need to go to the add-on where you wrote the code.
Disadvantages:
- All the custom CSS will not be in one place. They will be scattered across your site. You need to remember in which add-on and page you wrote the code.
- It does not provide IntelliSense.
Issues with custom CSS
At times you would face some issues which would cause you to pull your hair out and scream for your colleagues. The most common issue is, you have written your code, there are no errors or warnings, and you have saved your work. In other words, you have done everything by the book, and your CSS is still not working. This could be because of two reasons:
1. CSS not applying
- Caching issues. Try clearing your browser’s cache and reloading the page, or open your site in incognito mode.
- Conflicting styles. CSS coming from the theme, page builder, or plugins may conflict with your CSS code. This may occur if the default styling (from your theme, page builder, or plugins) overrides your CSS. You can verify this by inspecting the code. Right-click and select inspect to access the developer tools. Select the section where you added your CSS, and in the right column, search for the styling you added. If you see that it is struck out, this means the default styling is overwriting your CSS code. Adding “!important” at the end of your code is a quick and easy fix. For example,
margin-bottom:20px !important
2. Browser rendering issues
Some specific styling may need a vendor prefix to render properly in different browsers. New CSS styling is not immediately available for all browsers, and to provide support, vendor prefixes give browsers access to new CSS features.
Here is a list of the vendor prefixes.
Internet Explorer: -ms-
Chrome: -webkit-
Safari: -webkit-
Firefox: -moz-
Opera: -o-
Conclusion
There is no correct way to write CSS. You can choose whichever method you prefer, but it is recommended that you stick with only one. It will be much easier to keep track of where the CSS is written this way.
If you are a beginner, it is best to write custom CSS in the additional CSS section of the theme customization. All of the CSS will be stored in one location, and you will not have to work directly with the theme files, which can be intimidating.
Write a comment below if you want to ask a question or give useful feedback.