
Statistics indicate that with professional assistance, a WordPress blog can be designed, developed, and launched in about three months. However, we are going to challenge ourselves and finish it on our own in a month or less. The tutorial, how to start a WordPress blog within a month is great for beginners, looking to launch their own website without spending a lot of cash.
You may be wondering, “How is this possible? How can I get a WordPress blog up and running in less than a month if I don’t have any experience with website development?”
It is possible, and we are going to do it because I’m going to walk you through exactly what I did, step by step, and if you follow along, you can do it too. You don’t need any special skills. You only need dedication and an eagerness to learn.
These are the topics that will be covered in this how to start a WordPress blog guide.
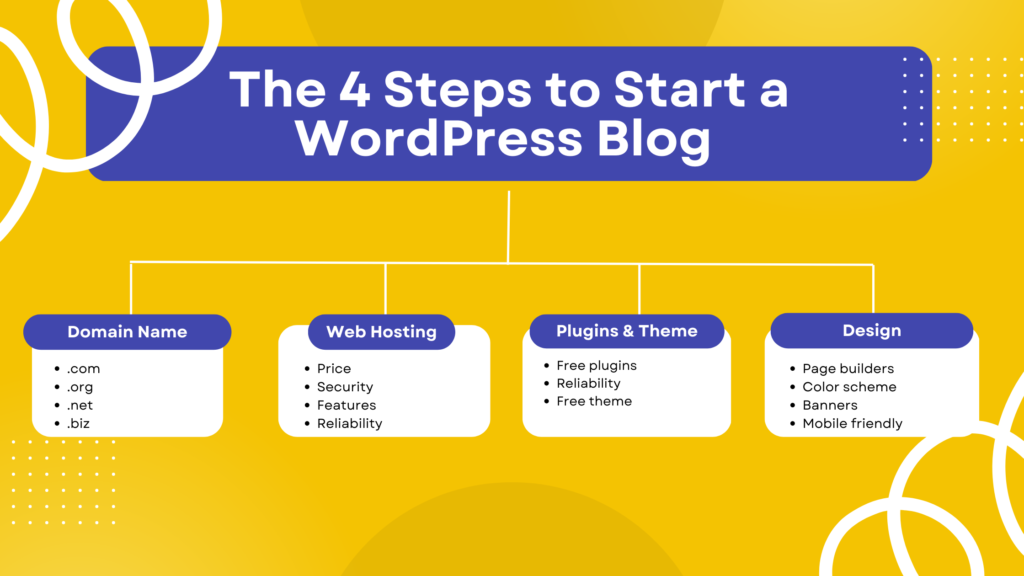
- How to choose a domain name: approximately 5 days
- How to choose a reliable hosting company: approximately 3 days
- How to install a WordPress theme and plugins: approximately 1 day
- How to design a WordPress site: approximately 5 days
It took me 14 days to get WP Educator up and running. It may take you roughly the same duration, more or less, to set up your blog.
How to start a WordPress blog step by step
1. How to choose a name domain name
The first and most difficult step is selecting a name. You need to decide what you are going to call your blog. It is critical to choose the right name. Your blog’s name will serve as your online identification. It should be relevant to the topic of your writing. For example, I provide lectures on WordPress tutorials, so I named my site WP Educator. WP stands for WordPress and Educator, because I teach people how to use WordPress.
Choosing a name took me approximately 5 days.
I jumped to a domain name finder tool and typed in a few names I liked to see if any were available. Don’t do this because it is an unprofessional way to work. You won’t come up with a good name, and most of them may have already been purchased. So, you will probably end up typing in random names, hoping to come up with something unique.
Don’t worry if you have no idea what a domain name is; I’ll cover that in Step 2. For the time being, let’s decide on a name for your blog.
Since my unprofessional name finding method did not work, I tried something different, and it turned out to be effective. If you follow along, you can settle on a catchy blog name in less than 5 days. If I followed this strategy from the beginning, I am certain I would have come up with the name in a couple of days.
- Google the keyword associated with your blog, and make a note of the top sites listed on the first page. We won’t use their names or write something similar. Keep in mind that we are aiming for something distinctive, something that will distinguish your brand and forge an online identity.
The goal here is to understand:
- Is the name related to what they are writing?
- Have they followed best practices when choosing a name?
- Did they use any abbreviations?
- How imaginative of a name did they use?
- Once you have noted the names, filter them to only keep the ones you prefer and delete the rest. Analyze the names they have chosen and see why you believe they are good. After that, go to a random name generator site. For example, Namelix.

Enter your blog’s keyword to get some ideas. It will prompt you to select a few generation options. When you click the “Generate” button, it will display a library of generated names that you can use for your site.
You don’t have to pick an exact name; these are simply ideas. You can choose a name if you like it, or you can mix and match. Now, you must be certain if this name is actually available.
Namelix provides an option in its settings to “Highlight name if domain is available”. The option is disabled by default. Go to the settings, represented by the gear icon, to enable the option.
Another way is to go to any domain name finder site, enter the name, and see if it’s available.
If it is, congratulations! If not, back to the drawing board.
2. How to choose a reliable hosting company
You have chosen a domain name and it is available. You now need to purchase it before someone else does. There are plenty of hosting companies where you can purchase a domain and a web hosting service.
What is a domain name?
A domain name is your site’s online identity. It is an easy to remember name, typed by your visitor in Google so that they can find and visit your site. For example, Google, Facebook, and Yahoo are unique and easy-to-remember names.
What is web hosting?
After you have purchased a name, you need to make it accessible to the world, and that means launching it on the world wide web. For that, you need to host your website. A web hosting service is a space where you can publish your website, maintain it, and make it accessible on the World Wide Web.
What to consider when choosing a web hosting company?
1. WordPress Hosting Package
A web hosting company will offer different packages that you can purchase along with the choice to buy a domain name. Some companies offer a domain name for free if buy a hosting plan. A company that I would recommend and use is Hostinger. Hostinger provides different hosting packages for small-to-medium sized websites, for large scale websites, and dedicated hosting for WordPress websites.
You can select any hosting type and package you believe is best, but I would recommend the WordPress hosting service, as it will automatically install WordPress along with a few required plugins.
2. Security
Many hackers out there infiltrate websites by injecting viruses in order to steal sensitive data like personal information, payment information, contact information, etc. You need to confirm that the hosting provider offers a solid layer of security solutions in order to safeguard both you and your clients.
Security should include:
- SSL Certificate
To protect your website by encrypting the sensitive information. - Automated Backups
Daily or weekly automated backups are recommended so that you can restore your site if it has been hacked. - SSH Access
A secure access with the remote server to manage website files and databases - Malware Detection
If your site is infected, the web hosting company should be able to detect, report and provide the recommended actions on how to deal with it. - Other security mesaures such as multiple firewalls and network monitoring.
3. Data Centers
Who is your target audience? Is your blog dedicated only to a specific region, for example, writing about farming, which would prove helpful for farmers in Asia? Or are you writing about adventures in the Middle East and want your readers to be mainly from the US and Canada, with whom you can share your travel experience and encourage them to list the Middle East on their bucket list?
The term “target audience” refers to the global geographic region you would like to focus on, such as the Middle East, Europe, Australia, Asia, etc. It has nothing to do with age or gender.
When launching your site, web hosting companies offer which data center you would like to choose.So, before selecting a company, view where their data centers are located as this will help to achieve a maximum load speed for your target audience.
4. Bandwidth
Bandwidth means the amount of data and how quickly your website can transfer it to the user in a given amount of time. The greater bandwidth capacity you have, the more data can be transferred at one time.
Every site has a bandwidth limit, and once the limit is reached, the hosting company can temporarily shut down your site. But don’t worry, you can bypass this issue by going for a better hosting package or upgrading your current hosting plan.
Different packages offer different bandwidth, which is sold in GBs. Some hosting companies offer “unlimited bandwidth”. This is just a sales gimmick to attract users into purchasing their services. Every hosting company has a limit. They write about unlimited bandwidth because the company knows that, based on the selected hosting plan, there is a small chance that the site will exceed the bandwidth.
While surverying hosting plans, you will come across text such as “ideal plan for beginners”, “perfect plan for small websites”, “best plan for large businesses” and so on. Based on the package selected, the hosting company knows that the site will not exceed that bandwidth.
5. Monthly Visits
Did you know that hosting companies limit the number of monthly visitors your site can receive? Fortunately, this monthly limit is not a constraint. It simply indicates how much monthly traffic your site can manage for optimal performance.
Go for at least 20,000 plus visits for a month. Your site may not receive a high volume of traffic in the first 6 months but the internet is unpredictable. If you are able to reach high monthly visits consecutively, your already purchased plan which allows a large number of monthly visits. This will not reduce the optimal performance of the site and there will be no need to upgrade from your current plan.
6. Customer Support
Customer service is critical, and you should select a web hosting company that provides outstanding customer service. Remember that just because they offer 24/7 assistance does not mean their services are the best. It’s great to having customer service available whenever you need it, but they should be able to do more than just generate tickets and place your question in a queue to be answered a few days later.
Customer reviews are the best way to find which hosting company has the best customer support.
7. Other Features
A few other features you should keep an eye out for are:
- Free SSL Certificate
- Free Email
- Daily/Weekly Backups
- Free Domain
These options should be free with the hosting plan or at least be free for the first year.
8. Read The Fine Print
Many companies offer hosting plans at a reduced cost along with a few complimentary features. It could be a good deal, so take advantage of it, but remember to read the renewal terms and conditions.
For example, a $3 hosting plan is attractive and affordable, but when you renew it you may have to pay double or triple the price, along with paying for some of the free options such as domains, SSL certificates, etc., which are not free after the first year.
3. Installing a theme and a few plugins
If you selected a WordPress hosting plan as suggested, you will see that WordPress has automatically been installed by Hostinger, along with a few plugins. This is fantastic and has saved us time, but we need a few extra things to get started.
Please note that these themes and plugins are not mandatory. However, installing them will really make it easy to kick-start your website.
Theme
By default, WordPress comes with a few themes which structure the design and appearance of your website. You can either use those or install another theme, which will provide some extra features. Don’t worry, it is a freemium theme. You can also purchase it and unlock some extra features, but I have always used the free version and it has worked wonders for me. So, I wouldn’t recommend purchasing it unless there are some extra options you desire.
The theme that I am talking about is Asrta. You can download it completely for free, install and activate it, and change the overall design and appearance of your website.
Plugins
If not already installed, here are the basic plugins I use and would suggest you do the same.
- Elementor
- Nitropack
- WP Forms
- All in one SEO or Yoast SEO
You simply need to navigate to the plugin section, search for these plugins, and install them.
To understand more about these plugins and why you need them, I would suggest reading How to start a successful WordPress blog.
It is a detailed guide, explaining how to make your WordPress site successful and why the listed plugins are important.
4. Desiging the site
Now comes the important part, which is designing the site. This is a crucial step and should not be taken lightly. A beautiful, easy-to-navigate site is what attracts and reels in new readers. If your layout is boring or difficult to use, no one will use it.
Site design does not mean throwing in animations, sliders, colorful text, and graphics. All of this will complicate things.
Simplicity is key. Remember that design means attractive and easy-to-navigate. Here are a few points you should remember when working on the appearance of your site.
- Whatever color scheme you choose for your site, it should be easy on the eyes.
- Use a few colors; a maximum of three is enough. Don’t go for more unless you want to emphasize something.
- Font should be easy to read and always go for black or something similar for the paragraphs. For the headings, you can go with a different color, matching your site’s color scheme.
- Your website should include a main menu and a footer menu.
- If you choose to add a side menu, include it only for your blog pages and list the important points so that readers can know and easily jump from one section of your page to another.
- Your site should be mobile friendly.
Do you have a logo ready? If not, there is no need to hire a designer.
How to create a logo for free (The professional way) is a good starting point. You will learn the fundamentals of logo design and leverage free tools to create the logo you want for your website.
Conclusion
- Domain name purchased – CHECK
- Hosting plan purchased – CHECK
- Themes and plugins installed – CHECK
- Website designed – CHECK
Congratulations! You now have a WordPress site up and running. How long did it take you to start a WordPress blog? Let me know in the comments below.
All you need to do is write, write, write!