If you log in to your WordPress admin panel and see a notification at the top that says, “WordPress 6.1.1 is available! Please update now.”, don’t panic. It means you must update your WordPress to the latest version. If you don’t know how to update WordPress, plugins, and themes, then you have come to the right place. In this tutorial, I will teach you step-by-step how to perform updates properly.
4 Reasons Why You Should Update WordPress, Plugins, and Themes
When a new release is available, you will notice that your site is running fine. There are no issues or bugs, and everything is the way it should be. So, you are probably wondering why you should update WordPress, plugins, and themes to the latest version.
Here are four compelling reasons why you should update WordPress:
1.) Security
WordPress updates include security fixes to protect your site from vulnerabilities. Therefore, keeping your site up to date can help protect it from being hacked.
2.) Performance
Newer versions are often faster and more efficient than older versions. An update improves the site’s performance, which leads to a better user experience.
A new WordPress update is a maintenance update that features a multitude of fixes. If you want to know what these fixes might be, click the “WordPress 6.1.1” in the notification. It will redirect you to the WordPress version page. From there, scroll down to the maintenance update section. You will see a list of bug fixes.
3.) New Features
Each new version of WordPress includes new features and improvements. Therefore, an update will make your site more powerful by installing these new features.
4.) Compatibility
Updating WordPress can help ensure that your site is compatible with new versions of themes and plugins.
It is not compulsory to update your WordPress site; however, the WordPress developers recommend it. You should update WordPress to ensure your site is secure, fast, and functional.
How To Update WordPress, Plugins, and Themes the Proper Way?
You are probably wondering how to update WordPress, plugins, and themes. Should you click the update button, or does it require a more professional approach?
If you are unsure how to proceed, here is a 6-step update procedure.
- Back up your WordPress website.
- Create a child theme.
- Create an override for plugin template files.
- Update WordPress.
- Update compatible plugins.
- Update the theme.
Step 1: Back up Your Entire WordPress Website (Files + Database)
Whenever you work on your website, whether it is a minor change or you want to update WordPress, plugins, and themes, make it a habit to back up your entire WordPress website.
If anything goes wrong, you have a back up to fall back on. Otherwise, you may lose important work.
There are two ways to create a backup of your WordPress site.
Method #1: Use a WordPress Plugin
Many WordPress plugins can help you create backups of your site. Some popular options include:
- UpdraftPlus
- BackupBuddy
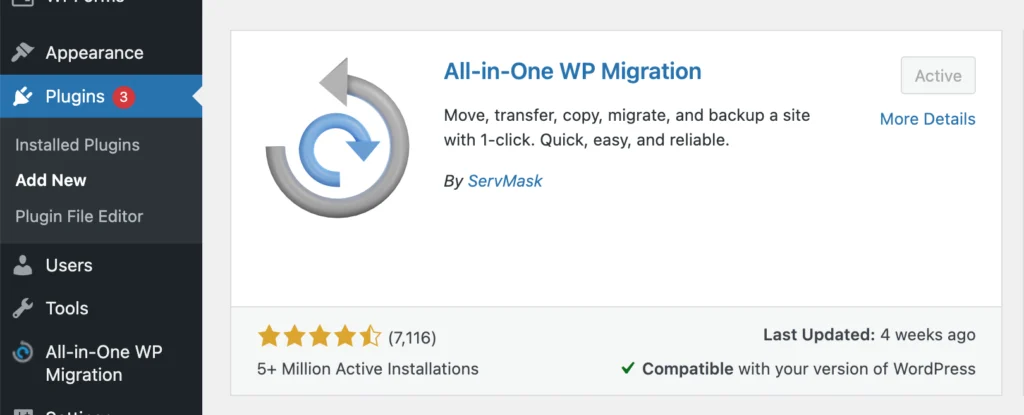
- All-in-One WP Migration
- VaultPress.
These plugins allow you to take manual and scheduled automatic backups and store them on a remote location such as your computer or a cloud storage service.
I will demonstrate how to use All-in-One WP Migration to create a WordPress backup.
1.) Go to Plugins -> Add New and search for All-in-one WP Migration. Install and activate the plugin.
2.) The plugin will be available in the left sidebar navigation. Hover over All-in-One WP Migration in the left-hand menu. Click on the backups menu and then click on the Create Backup button. It will take a few minutes to back up your entire WordPress site.
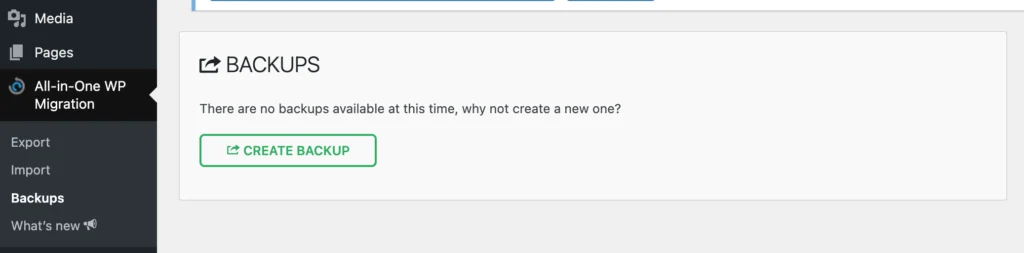
3.) Once the backup is complete, you will be asked to click the Download button to save the file to your computer. The backup will also be available in the All-in-One WP Migration -> Backups.
Method #2: Backup Your Site from hPanel or cPanel
You can back up your WordPress site using Hostinger hPanel. If you are using another hosting provider, it would be called a cPanel or another name they have come up with.
Log in to cPanel, go to the backups section, and follow the prompts to create a full backup of your entire WordPress site.
It could be a complicated step if you don’t have web development experience. So you’d better let a developer handle this or make it easy on yourself and use a plugin.
Step 2: Create a WordPress Child Theme
After taking the backup, the first thing you need to do is create a child theme. You already have an active theme on your WordPress, right? Using that theme, create a child theme and do every customization in that.
The benefit of creating a child theme is to protect all of your custom work, such as:
- CSS
- Javascript code
- PHP code
When you update the theme, all the custom work in the child theme will not be overwritten. It is also needed to create plugin template override files, which I have explained in step 2.
Are you still confused? Read on to understand what is a child theme and how to create a child theme in WordPress.
What is a WordPress Child Theme?
As the name suggests, a child theme is a sub-theme of the parent theme. It possesses all the qualities and functionalities of the parent. So, a child theme inherits everything from its parent, and it depends on it to control every functionality.
However, a child theme comes with an extra superpower. This superpower is the ability to customize it. Changes include:
- Updating the CSS
- Writing JS and PHP code
All the modifications will now be inside the child theme. You will be able to enhance the functionality without touching the parent theme.
Now, whenever you update your theme, all the changes are maintained inside the child theme. So you will not lose any customization at all.
How to Create a Child Theme in WordPress?
Building a child theme in WordPress is easy, especially with the automatic method. There are three ways to create a child theme. Each of these methods has its advantages.
Method #1: Use a Child Theme Generator Web Application
The child theme generator is a free web application. Using this free service, you can generate a child theme within minutes.
1.) Head on over to the child theme generator website.
2.) Over there, enter the details of the parent theme of which you want to create a child theme. The web application will automatically find the parent theme and create a child theme based on it.
3.) Download the zip file of the child theme.
4.) Install and activate the child theme on your WordPress website.
Method #2: Use a Child Theme Generator Plugin
You can install a plugin that will create a child theme for you. However, I argue that you install reliable plugins only that do not pose a vulnerability threat.
Here are a few child theme plugins you can try:
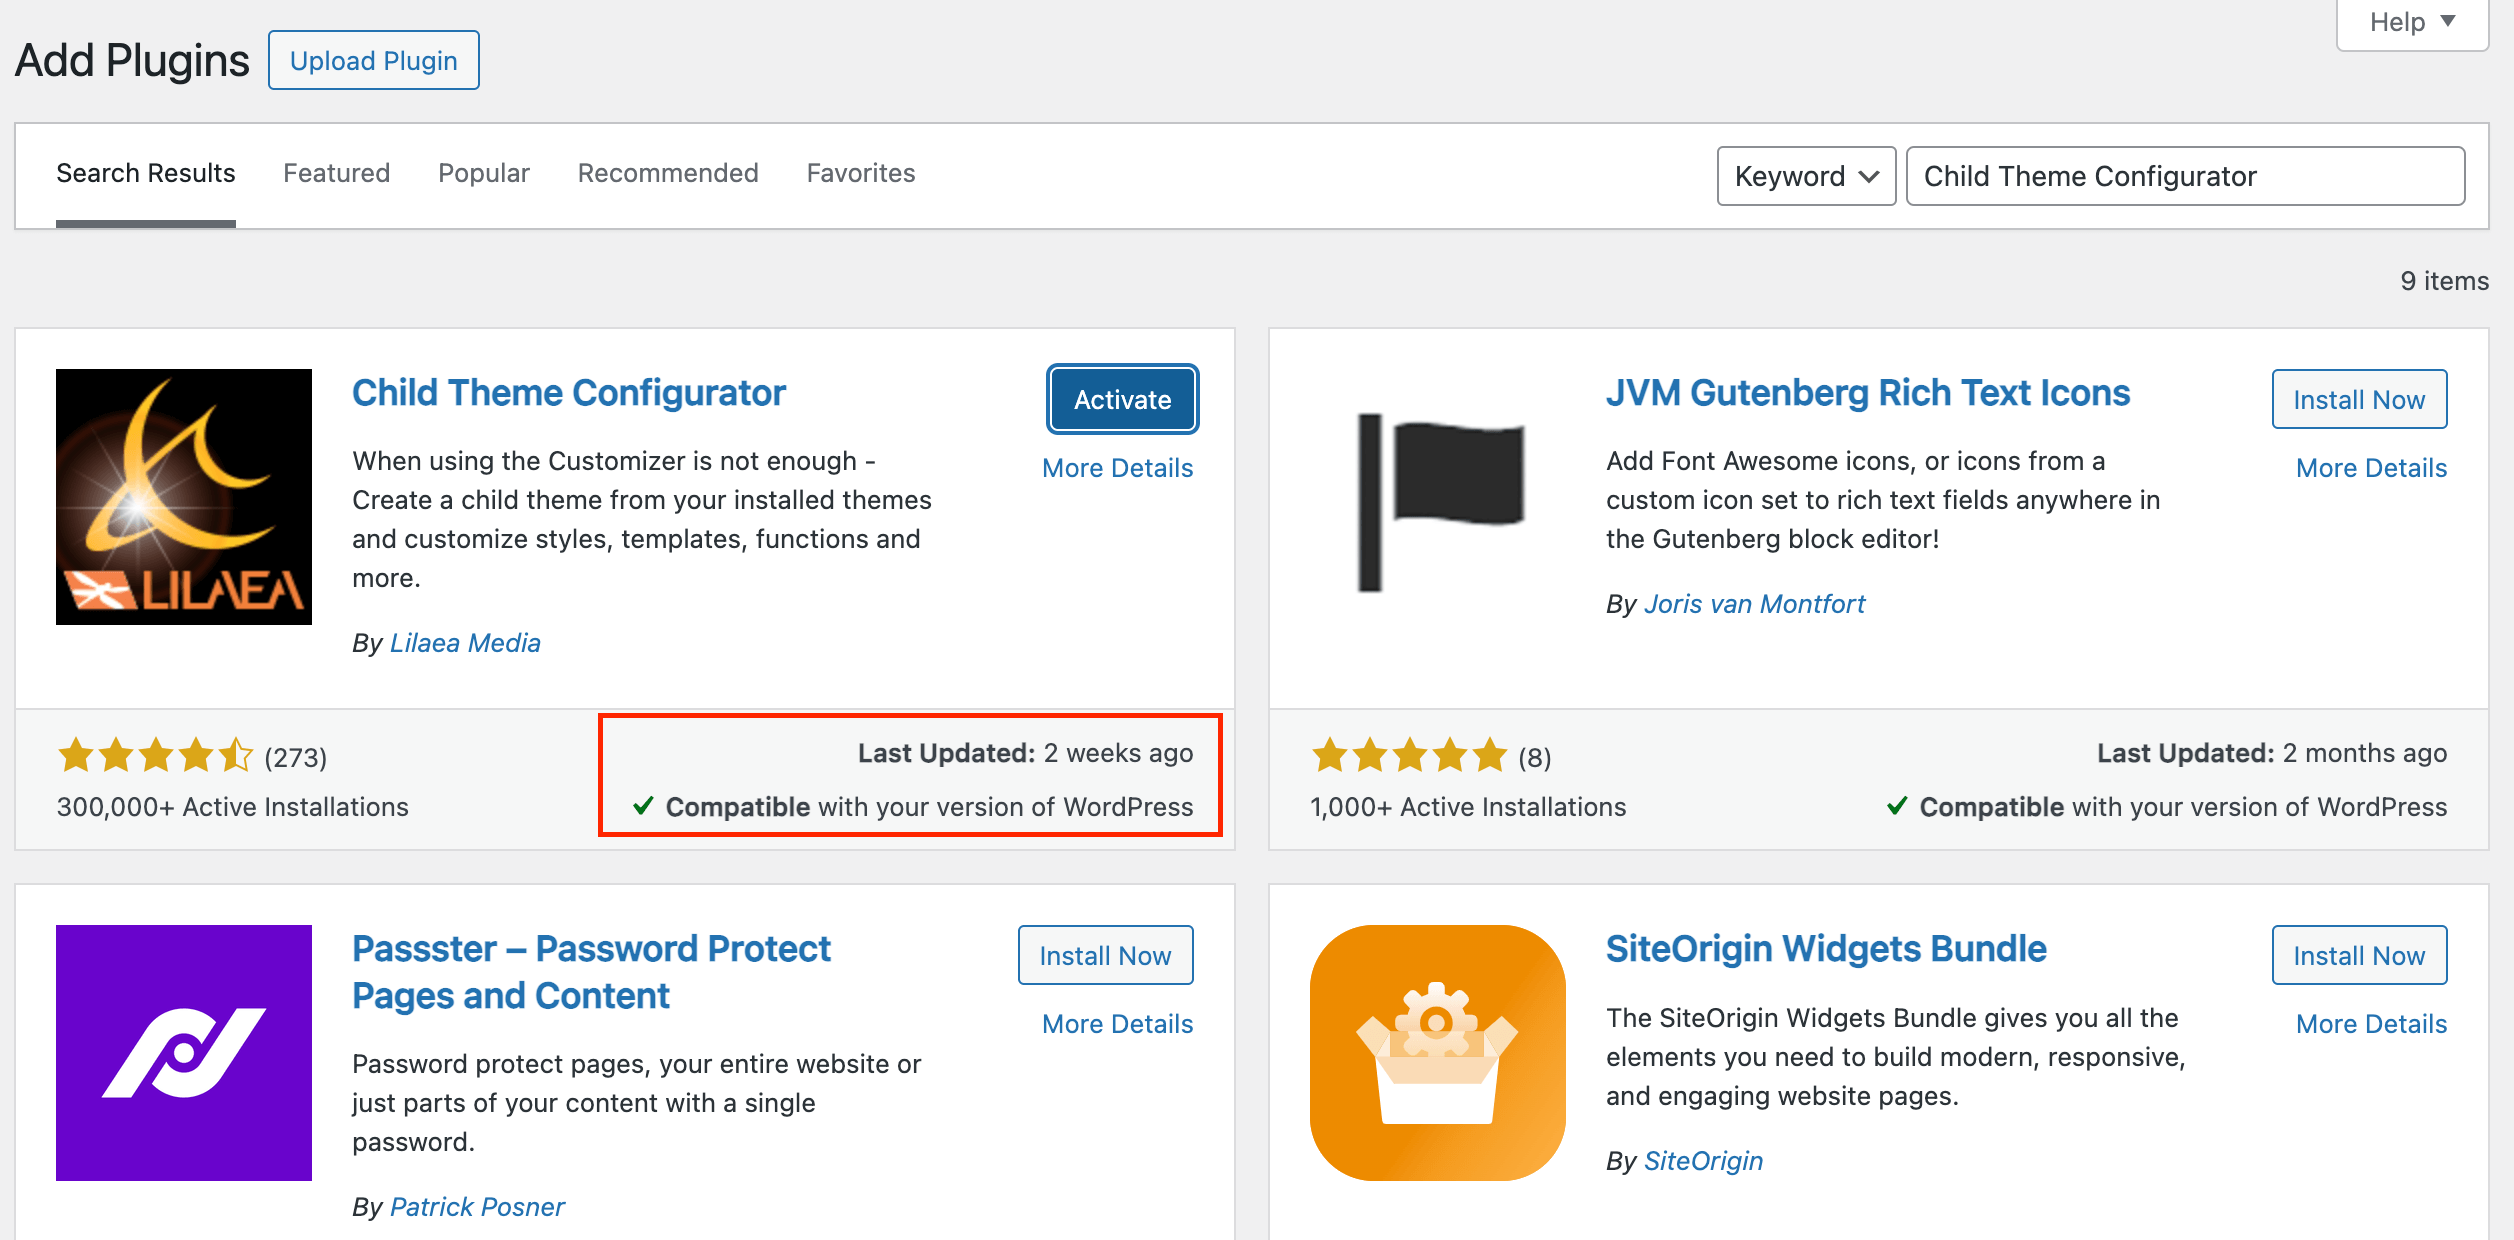
I will use the child theme configurator plugin to demonstrate how to create a WordPress child theme.
1.) Go to Plugins -> Add New Plugins and search for Child Theme Configurator. Make sure the plugin is compatible is recently updated and compatible with your WordPress version. If yes, install and activate it.
2.) Go to Tools -> Child themes. In the Parent/Child tab, select CREATE a new Child Theme in the first option. In the second option, select the parent theme for which you want to create a child.
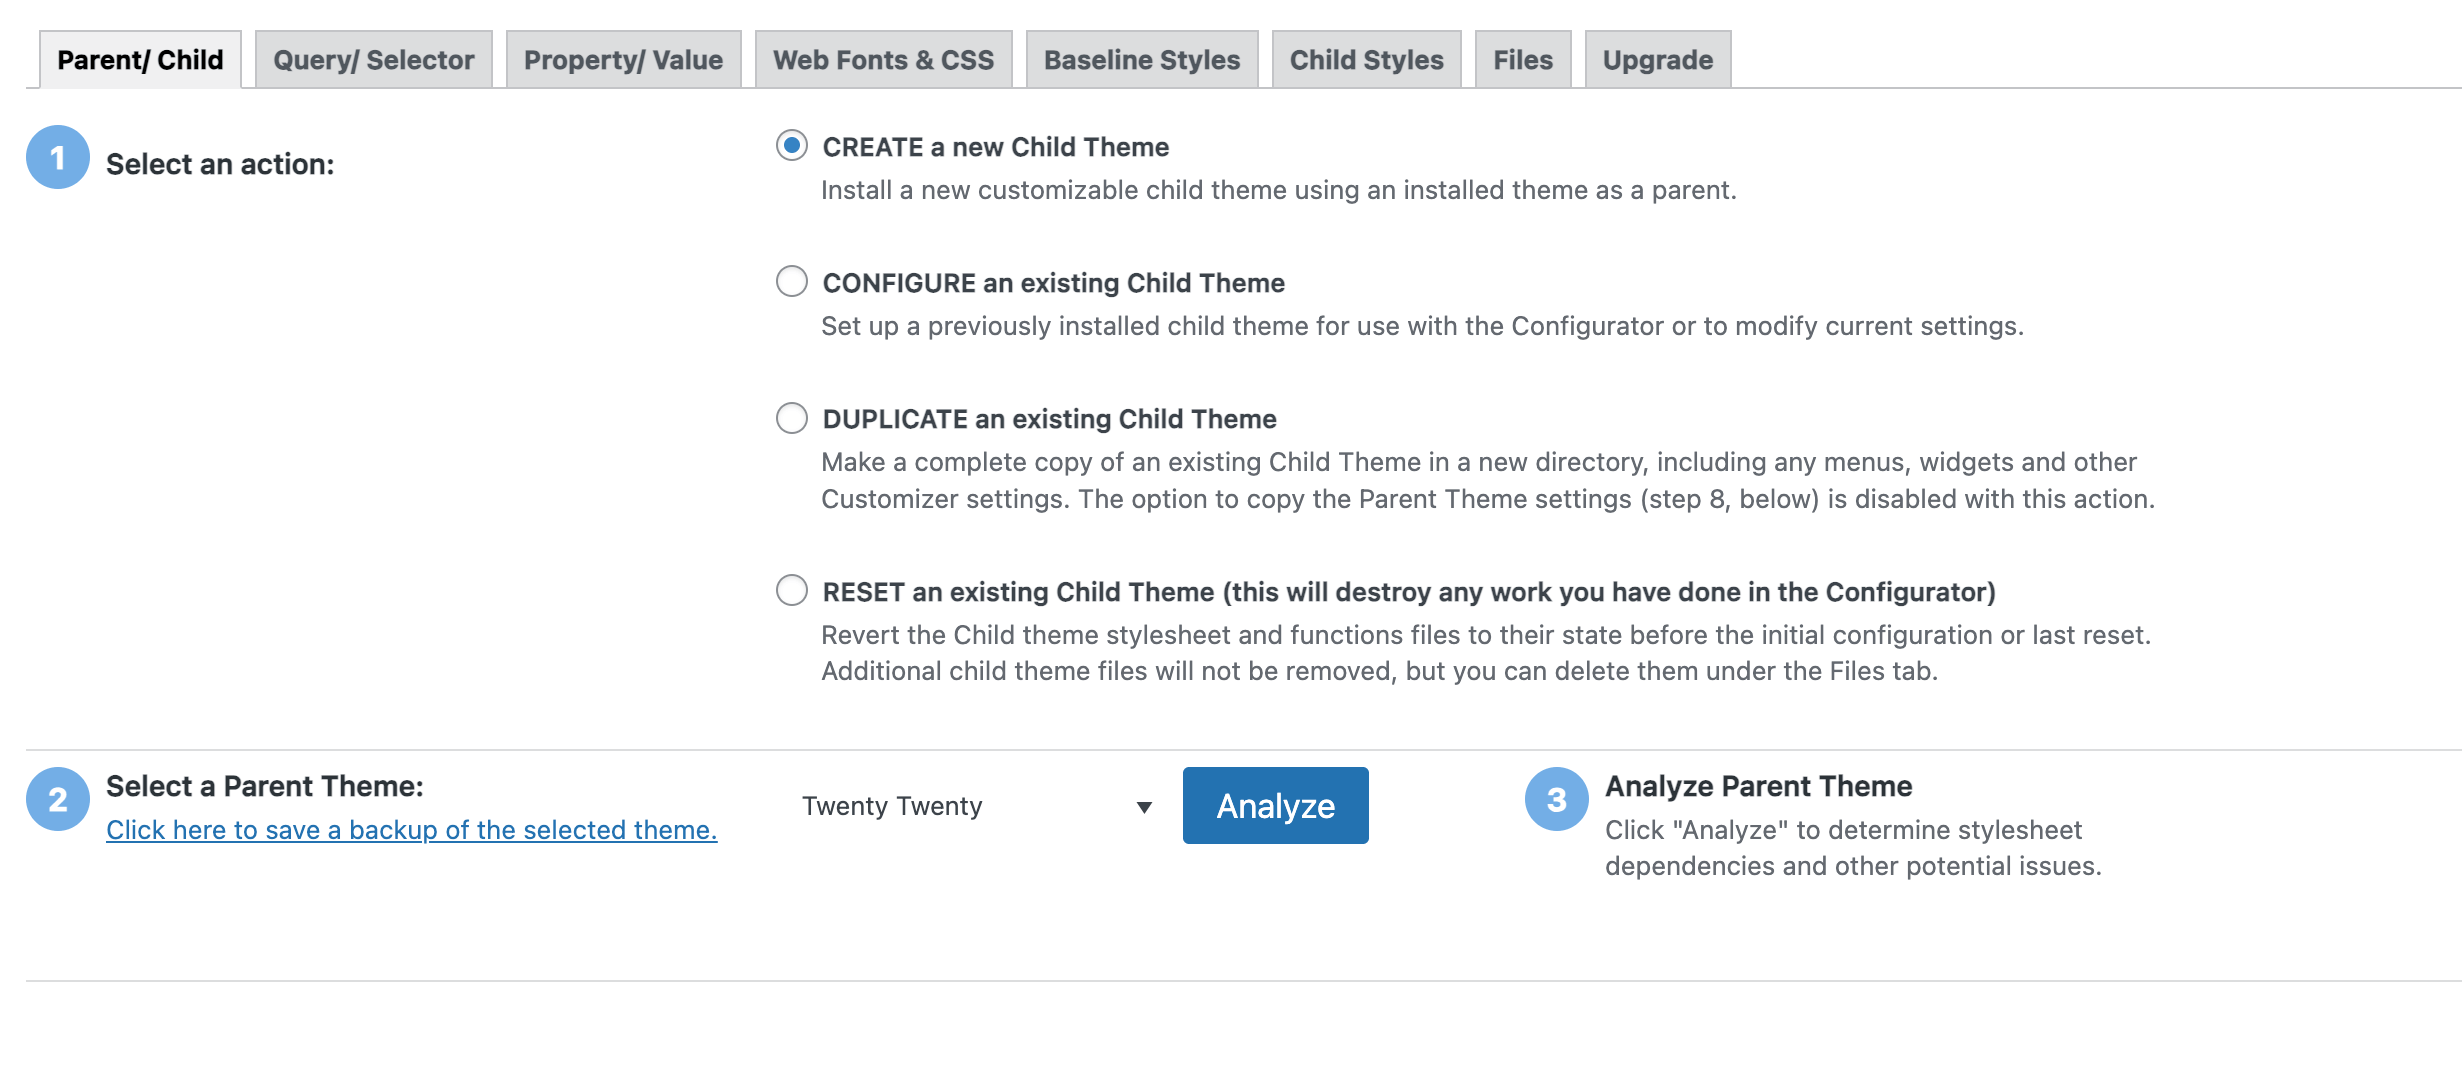
3.) Click on the Analyze button. It will check for dependencies and issues and reveal a few more steps.
4.) Everything is as it should be, so there is no need to change anything. However, in Step 7, you can edit the child theme name and description if you want.
5.) Once satisfied with the settings, click Create Child theme. It will only take a couple of seconds to generate.
6.) Go to Appearance -> Themes, find the newly created child theme, and activate it.
Method #3: Create a WordPress Child Theme Manually
Creating a WordPress child theme by code will take time and requires web development experience. For this reason, I would recommend method one or method two.
However, if you prefer to create a child theme manually, here are the steps you need to perform.
1.) You must log in to your hosting account, where your WordPress installation files are stored. If you are looking for a reliable hosting company to start your WordPress blog or website, I vote for Hostinger.
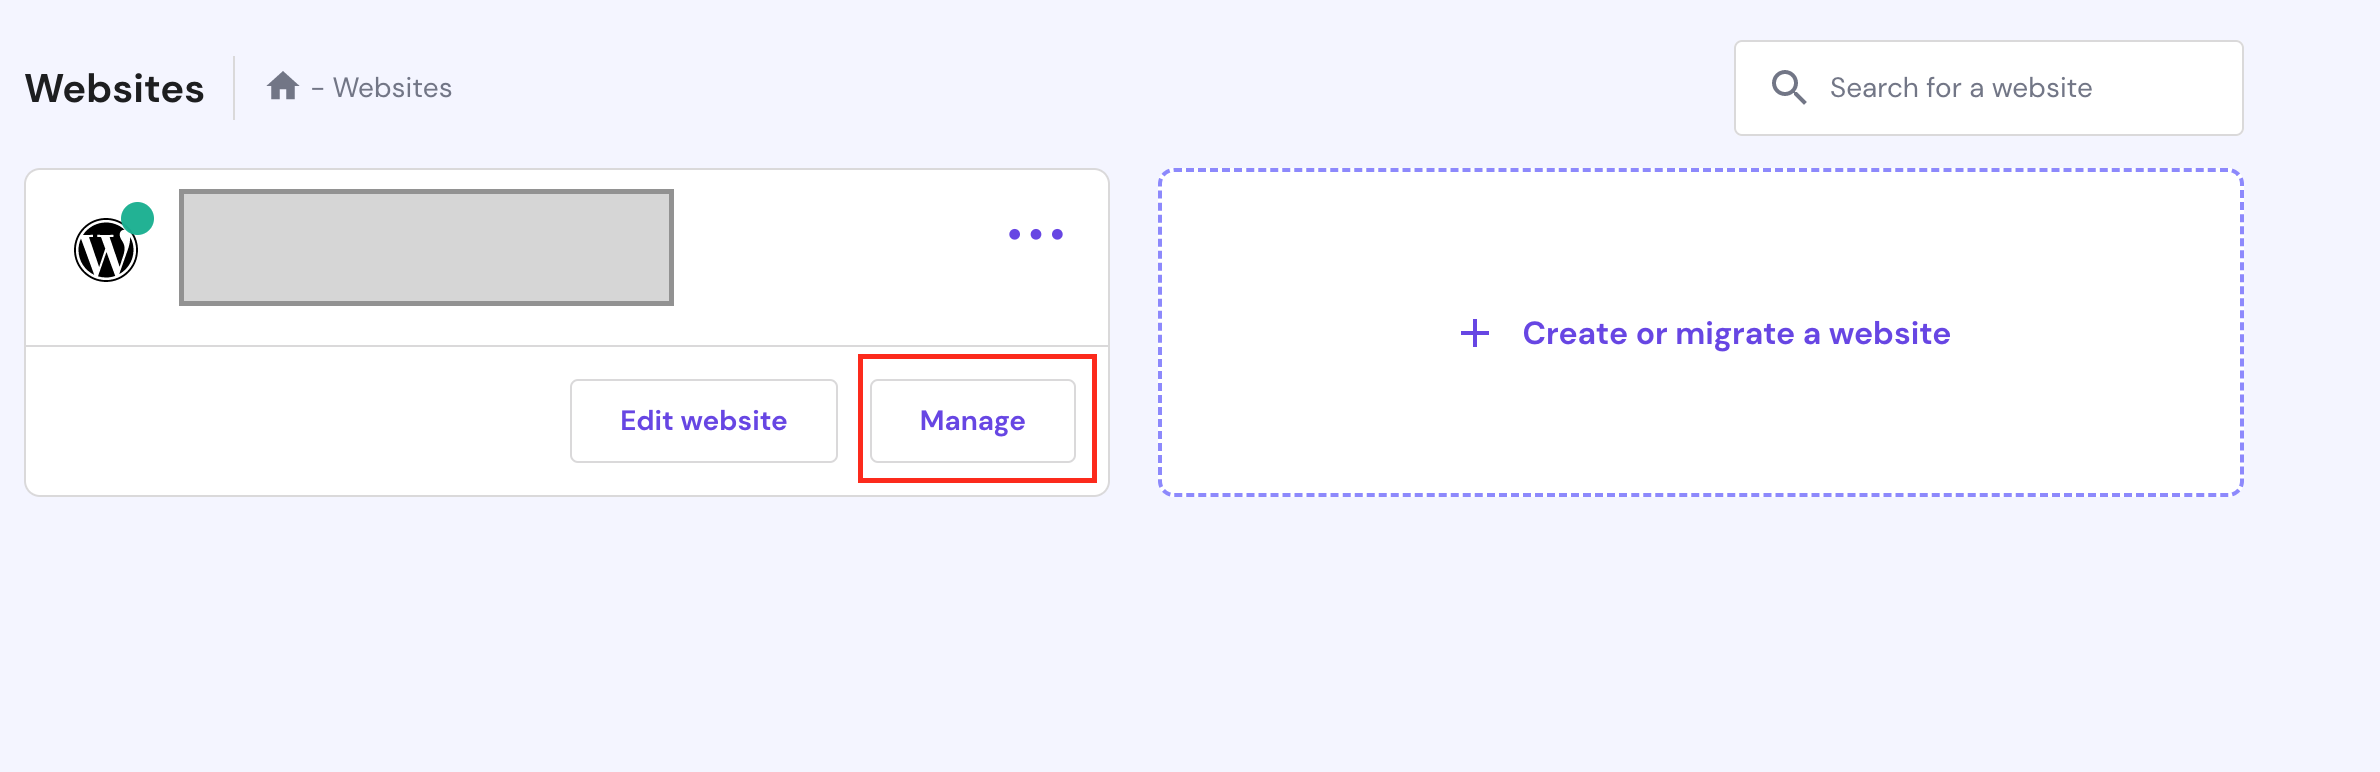
2.) Choose your site from the list and click on the Manage button.
3.) Click on file manager. It will redirect you to the WordPress installation folder. Go to wp-content -> themes and create a new folder for your child’s theme. Give it the same name as the parent, but write child at the end to differentiate between the parent and child themes.

4.) You need to create two files for your WordPress child theme:
- style.css
- functions.php
5.) Open the style.css file of your parent theme and copy the theme information. It will be at the top of the file. You need to copy the following information:
- Theme Name
- Theme URI
- Description
- Author
- Author URI
- Text Domain
- Version
6.) Open your child theme folder and create a new file with the name style.css. Paste the code over here:
Theme Name: Twenty Twenty One
Theme URI: https://wordpress.org/themes/twentytwentyone/
Description: Our default theme for 2020 is designed to take full advantage of the flexibility of the block editor.
Author: the WordPress team
Author URI: https://wordpress.org/
Text Domain: twentytwentyonechild
Version: 2.5
You can update some of the fields if you prefer, such as the author and description information.
7.) Now, you need to create the functions.php file. It will import or enqueue the stylesheets from the parent theme. Create a new functions.php file and paste the following code:
/* enqueue scripts and style from parent theme */
function twentytwentyone_styles() {
wp_enqueue_style( 'child-style', get_stylesheet_uri(),
array( 'twenty-twenty-one-style' ), wp_get_theme()->;get('Version') );
}
add_action( 'wp_enqueue_scripts', 'twentytwentyone_styles');
8.) After creating both files, the child theme will show in your WordPress theme section. Head to your WordPress admin area. Navigate to Appearance -> Themes and activate your new child theme.
If you are having trouble creating the child theme via code, I would suggest using the plugin or the free web application.
After verifying that the child theme is working, take another backup of your site. The next step is creating plugin overrides. It is best to have a backup in case something goes wrong.
Step 3: Override a Plugin Template File in WordPress (Optional)
After creating a child theme, it is time to construct a plugin override.
Did you customize a plugin to update the functionality according to your requirements? If so, you probably made changes inside the core plugin files instead of creating an override.
It is a common mistake that many developers make, especially beginners, because they are clueless about template overrides. Many usually find out about it after they update the plugin and notice that all the work they did inside the core plugin files is lost.
It happens because the plugin updates the root files built on the previous version. It doesn’t take into consideration any changes made in the file.
Therefore, creating a plugin template override is a great way to protect all your custom code. You can safely perform updates whenever a new version is available.
I will clarify what plugin template overrides are in a bit more detail. I will also explain how to create an override before updating WordPress, plugins, and themes.
Creating an override will ensure you will not lose all your hard work when you update that plugin. If you didn’t change the plugin files, skip this and move to Step 3.
What is a Template Override?
Template overrides allow you to customize a plugin. Instead of making changes inside the plugin core files, you write the code using a template override.
It allows you to update the plugin functionality without touching the core files. The benefit is when you update your plugin, you will not lose any customization.
So, if you tinkered with your core plugin files, you should create a template override before updating the plugin. So, if you proceed with the update before creating an override, you will lose all customization.
How Can We Override a Plugin Template File in WordPress?
Here is how you can create an override of a plugin template file in WordPress.
1.) Find the relevant core plugin file in which you want to make changes. The plugin files are in the wp-content -> plugins.
2.) Open the file you want to create an override for and copy the code. You may find instructions on what folder or folder paths you need for the plugin override. You can also read the plugin documentation.
3.) Go to your themes folder and select the active theme.
4.) Create the folders inside the theme and create a file with the same name as the one in the plugin folder.
5.) Paste the code into the override plugin file.
6.) Make tweaks in the code to make the website look the way you want.
Hopefully, you got an idea of how plugin template overrides work. You can now safely update your plugins without losing any customizations.
I Already Updated the Core Plugin Files. What Do I Do?
If you’re someone like me who has made changes to the core plugin, you would probably hesitate to update that particular plugin. Why? Because you probably don’t remember what the original code is. You also may not want to lose your customization.
Luckily, I found a couple of solutions for this problem, and the best part is you don’t need to restore your plugin version.
Solution #1 – Download the Plugin File
Solution 1 is a quick way to create an override if you have already updated the core plugin files.
- Download the plugin on your computer.
- Compare the file with the updated core plugin file.
- Create an override and copy the updated core plugin file there.
- Now, replace the core plugin file on your website with the file of the plugin you downloaded.
- Test the functionality.
If everything is functioning correctly, congratulations! You have successfully created the override.
Solution #2 – Install WordPress Locally
In four easy steps, you can install WordPress locally and then install and activate the plugin. After that, you can:
- Compare the functionality
- Create the plugin template override file
- Customize the file
- Test the functionality
Once you are satisfied that everything is working, you can copy the core plugin file from your local WordPress and replace it on the live site. After that, you can replicate the override file to your live site.
You may want to go with Solution 1, and I don’t blame you. It is a quick way to create a plugin template file override. However, installing WordPress locally and testing the plugin template override file is a better option.
Creating an override is a trial-and-error process. It means it may take time to find the correct file. You can test the plugin template override file on your local WordPress without the fear of breaking your live site.
Whatever solution you want to go with is entirely up to you. Just make sure that the plugin versions are the same.
Child themes (check)
Plugin overrides (check)
The latest three steps are about WordPress, plugins, and theme updates. So, take another backup before proceeding.
Step 4: Update WordPress to the Latest Version
To update WordPress, log in to your WordPress dashboard and go to Dashboard -> Updates. You will see a notification to update your WordPress version if available.
Click on the Update Now button to begin the update process. It will take a few minutes to update.
After updating, it’s a good idea to check your site for any issues and check all customizations are still in place. If you find any problems, you can use your backup to restore your site to its previous state.
Step 5: Update the Compatible Plugins Only
Before updating plugins, create a new backup of your site because sometimes plugin updates cause conflicts. These conflicts cause the site to break down or stay in maintenance mode.
After the backup is complete, it is time to update the COMPATIBLE plugins. I am emphasizing the word COMPATIBLE because we need to be careful that only the plugins compatible with the latest WordPress version are updated.
To check for plugin updates, go to Dashboard -> Updates and scroll to the plugins section. You will see a list of available updates for active and inactive plugins.
For each plugin, you can view its compatibility with WordPress.
- 100% means it is compatible with the latest version.
- Unsure means it may or may not be compatible.
You can update the plugins individually by selecting the check box and clicking the Update Plugins button at the top. You can click on the Select All checkbox to perform a bulk update. If you choose the Select All checkbox, you must uncheck the incompatible plugins manually.
After updating, check your site for any issues.
Step 6: Update the Active WordPress Theme
Before updating the theme, take another backup of your site.
Go to Dashboard -> Updates, scroll down to the end, and click the Update button for the theme you want to update.
Another option is going to Appearance -> Themes in your admin area. You will notice a red number. It will be next to ‘Themes’ in the admin sidebar. The number represents how many updates are available, and there will also be an update notification on the installed theme.
It is a good idea to check your site for any issues and explore what new features came with the updated version of the theme.
Conclusion
Easily update WordPress, plugins, and themes with this step-by-step guide. Don’t forget to take a backup of the site. It is super important. I can’t express how backups have saved my site whenever I encounter an issue.
I also urge you to stick with plugins instead of creating child themes and plugin overrides manually. If you have any questions or want to contribute something valuable, let me know in the comments below.