Navigating a website without a proper menu is like wandering in a maze without a map. Without an effective and user-friendly navigation system, you will see a decline in your monthly visitors. Therefore, menus in WordPress are an essential feature.
It allows users to navigate through the site effortlessly. You will not find any website without a navigation bar. It may appear as a simple menu, a flyout, or a mega menu.
If this is your first time creating a WordPress menu, this is an excellent resource for beginners. It covers the basics, such as:
- An explanation of menus.
- The different menu types.
- A step-by-step guide on how to create them.
Let’s get started.
What Are Menus in WordPress?
Menus in WordPress are similar to the navigation found on any website. They are links that allow users to travel back and forth between pages.
I am not going to bore you with the itty bitty details. I am sure you are well aware of the primary functions of website navigation.
But, I want to point out the various types of menus you can create and assign them to different locations.
Before creating and assigning menus, let’s start with the essential types.
Essential Menu Types for Your Website
When developing a WordPress blog, it is a standard practice to have these three menu types:
- Primary menu
- Secondary or additional menu
- Footer menu
But a WordPress website doesn’t show all of these varieties. Some websites may only have a header menu or a combination of a few different types.
First, let’s look at these three traditional navigation versions.
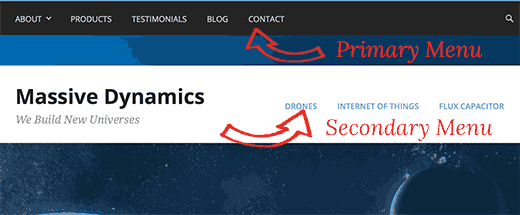
1.) Primary Menu
The primary menu is the default WordPress menu type. It is usually displayed at the top of a website, in the header, or as a flyout menu.
But, in today’s web design era, the primary navigation location is not restricted to the header. It can be in various places, such as the sidebar or even as a sticky navigation bar. That is why WordPress uses the word “Primary” and not the header.
It contains the most important links and pages that users may access frequently.
2.) Secondary or Additional Menu
Some websites may also contain secondary menus. Many refer to the secondary menus as footer or sidebar menus, but I don’t do that. I keep this type separate.
As the name suggests, I use it as a secondary menu.
So, instead of stuffing the main navigation with drop-down links, I create a secondary menu type. It is kind of an extension of the main menu.
It allows for a cleaner and more user-friendly design.
3.) Footer Menu
The footer menu doesn’t need any introduction. It is at the bottom of the site, next to or above the copyright information.
It provides links to important pages, like:
- Contact information
- Privacy policy
- Terms of service
Additional Menu Types
Apart from these types, you may have to create extra categories depending on the website design requirements.
For example, I usually end up creating the following types:
- Hidden menu
- Sidebar menu
- Member menu
Let me give you a quick example of how these different categories in WordPress can be helpful.
1.) Hidden Menu
I create a hidden menu for hidden pages. Hidden pages are not in any main menu, such as the header or the footer. These pages are available through direct links or specific actions, such as a special promotion.
When a site has many hidden pages, I create a menu type called hidden. I assign and store all these pages in this category.
It helps me maintain a clean and organized navigation structure for the website. I know where these pages are. So I don’t need to search the entire site.
2.) Sidebar Menu
I am sure everyone knows about the sidebar menu because it is a standard website feature. I will keep this short and sweet. Any WordPress page or post with a sidebar will have all the links in this category.
3.) Member Menu
Whenever I develop a membership or a WooCommerce website, I create a member menu type.
In this, I include links accessible to members, such as:
- Exclusive content
- Account settings
- Payment details
- Order history
- Any other member-specific pages
How to Create Menus in WordPress?
Creating menus in WordPress is a straightforward process. You don’t need any coding knowledge. WordPress has a drag-and-drop interface. This makes it easy to create and customize site navigation.
Here is a step-by-step guide.
Step 1: Log in to Your WordPress Admin Panel
Go to your WordPress admin panel and log in with your username and password. Once logged in, you will go to the dashboard.
Step 2: Navigate to the Menu Settings
Click on the menu link in WordPress. It is in the left sidebar under Appearance. Click on the menus to redirect to the settings page.
If you can’t find this link under Appearance, change your theme. I recommend going with Astra and don’t forget to create a child theme first.

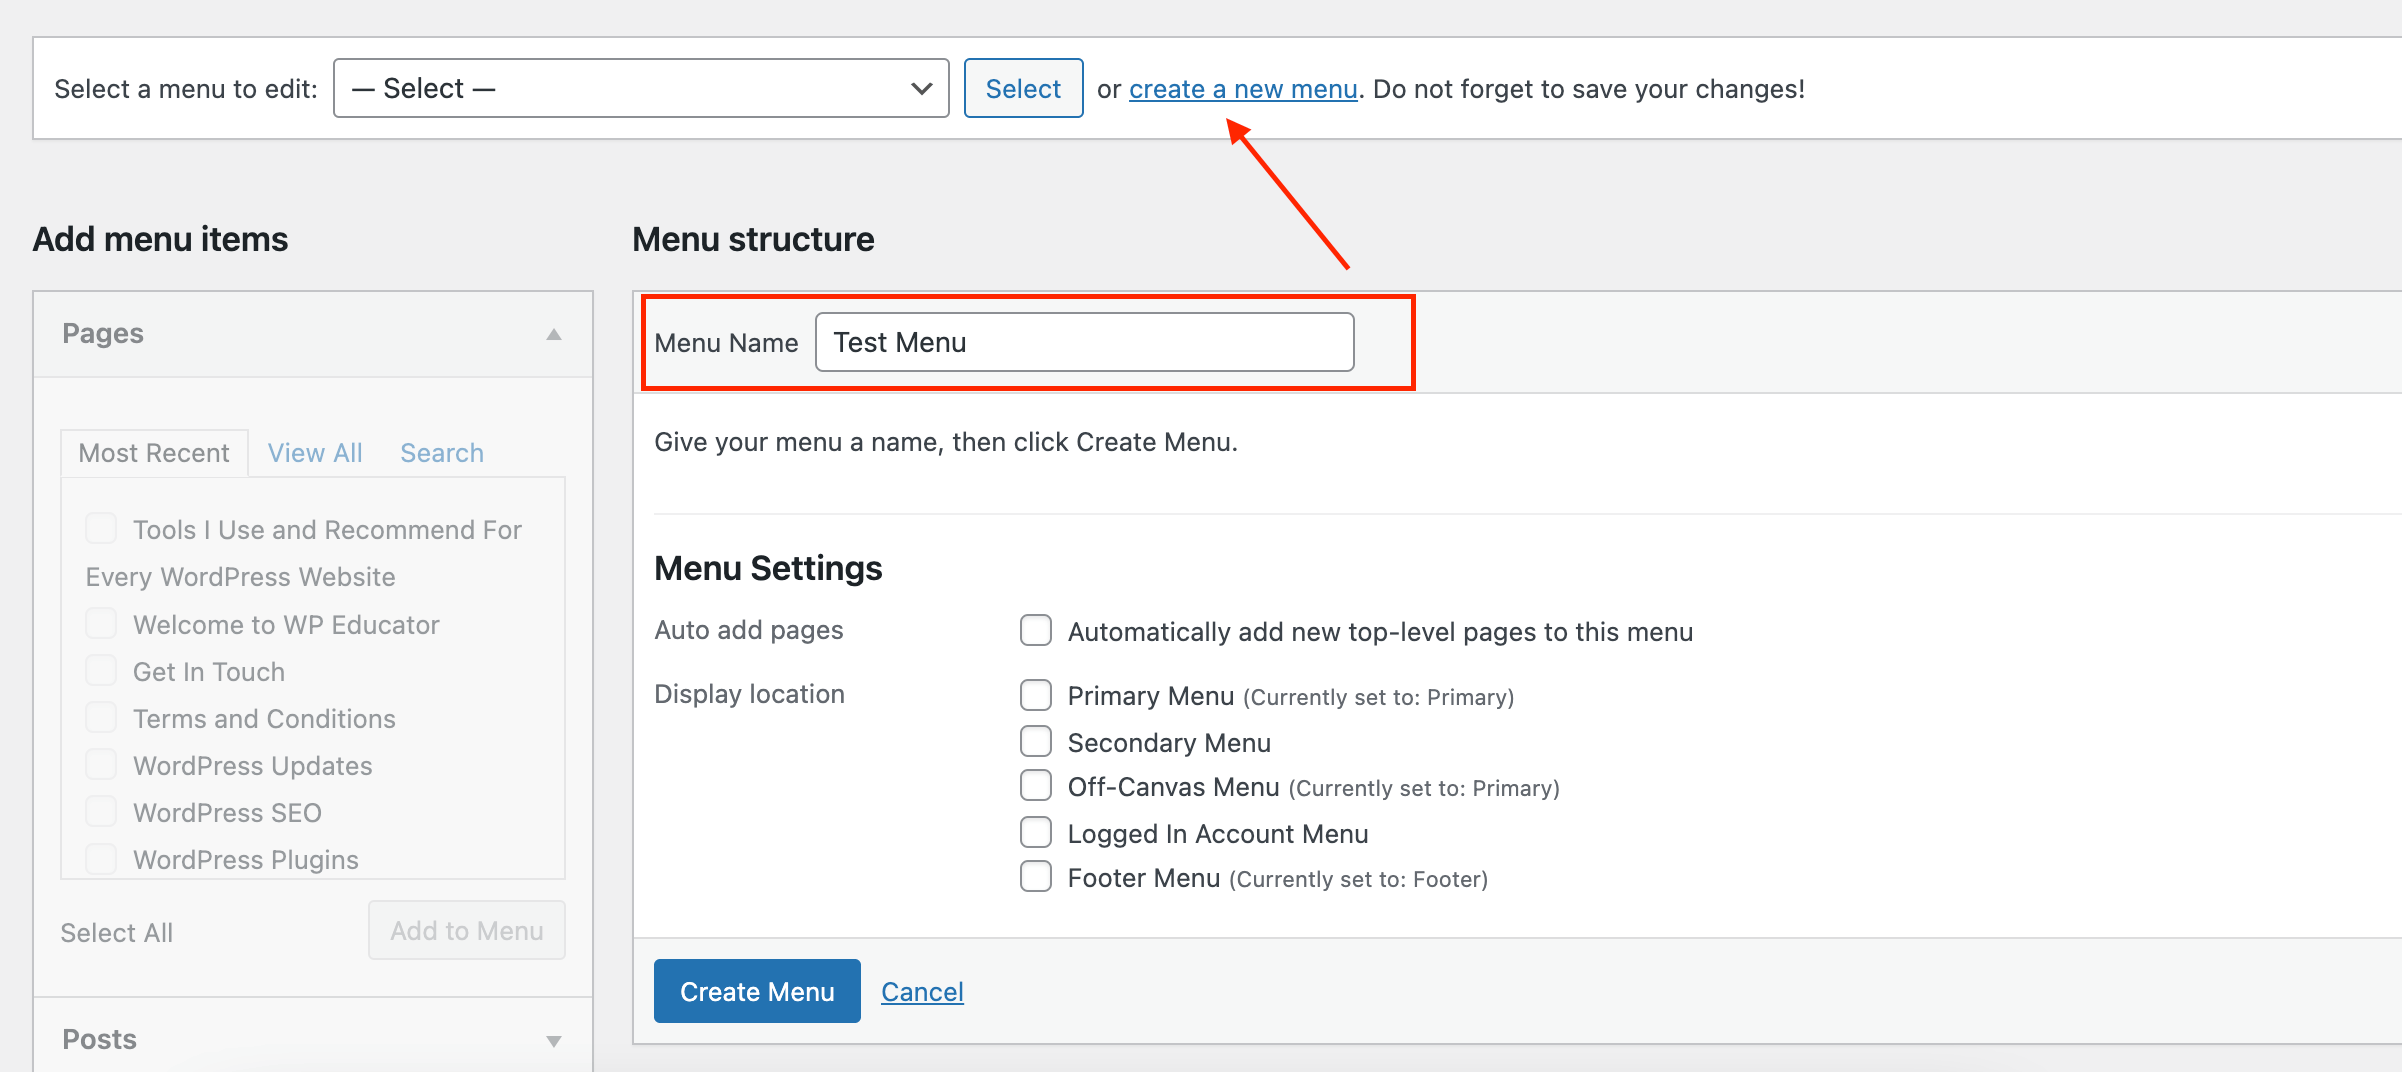
Step 3: Create a New Menu in WordPress
To begin, click the “Create a new menu” link and give it a name. You can write whatever you want (this is for internal use only).
Click the “Create menu” button.
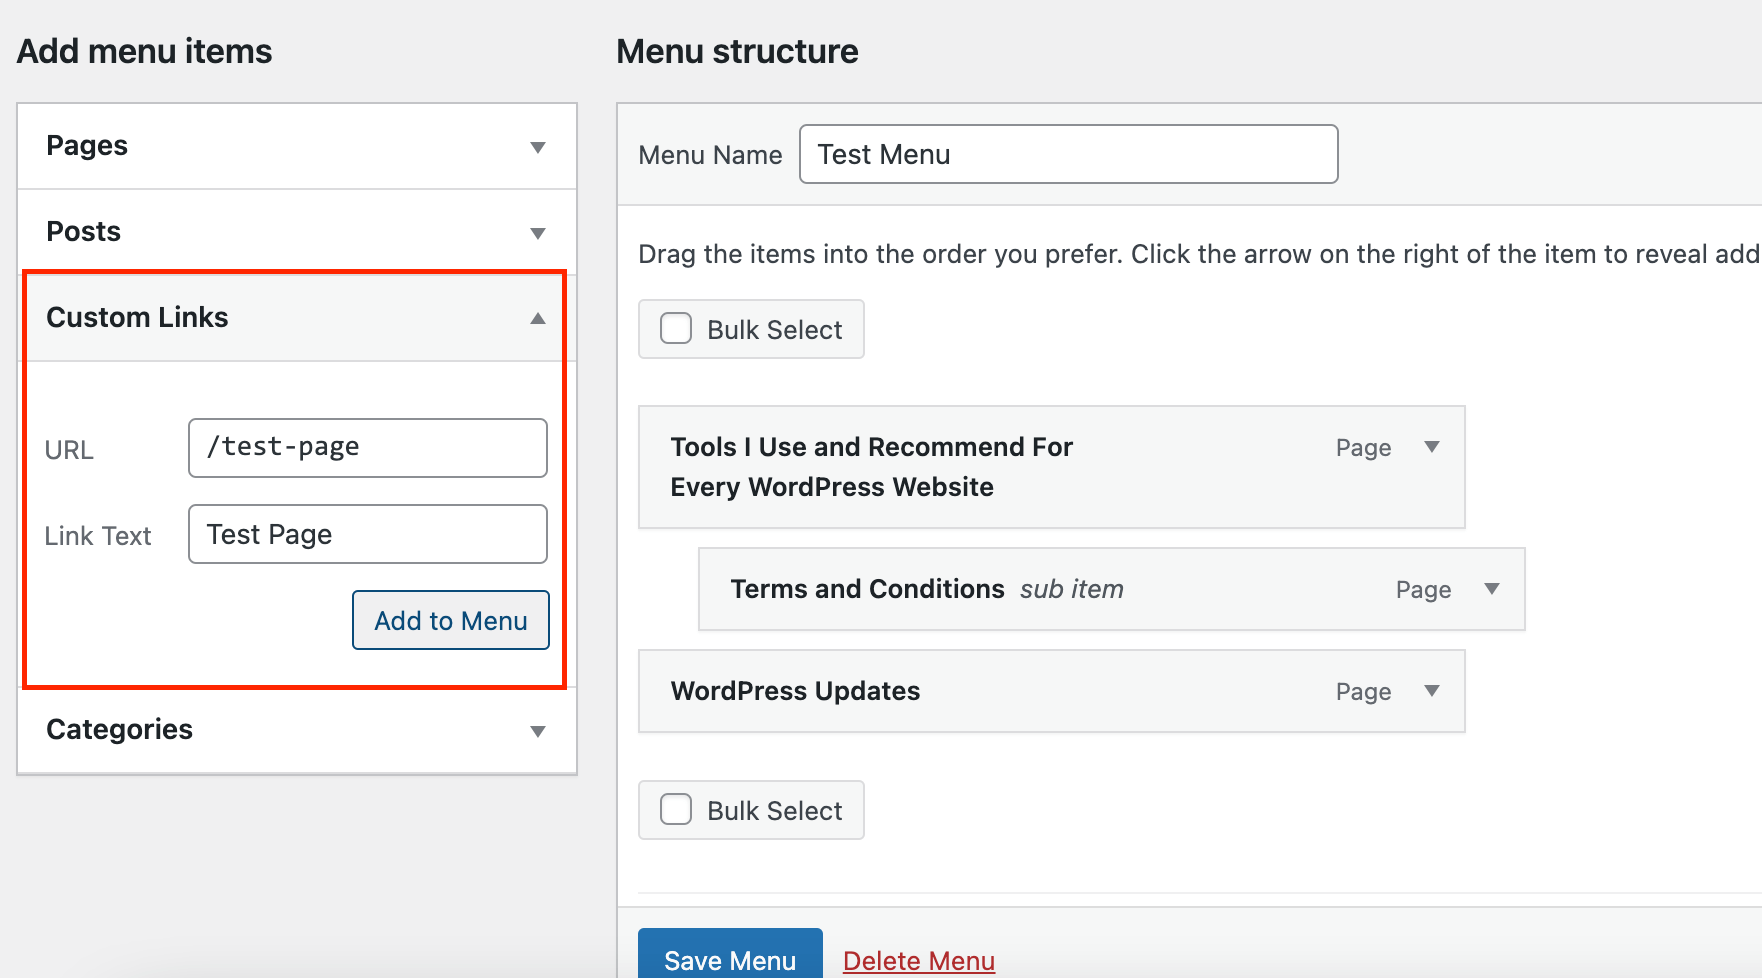
Step 4: Add Menu Items
Now it’s time to add items to your new navigation. If you look at the left side, there are four drop-down boxes labeled:
- Pages
- Posts
- Custom links
- Categories
The cool thing about WordPress is that you can add any of these options to your menu.
So, if you want to add a custom URL, you can do so by selecting the “Custom links” option and entering the URL and link text.
There is no limit to what type of items you can add. You can also have a combination of posts and pages.
Sounds amazing, right?
Here is a quick overview of how to add menu items in WordPress.
Let’s start with the first drop-down box, pages. To add pages to your menu:
- Click on the pages box.
- Checkmark the items you want to add.
- Click on the “Add to Menu” button.
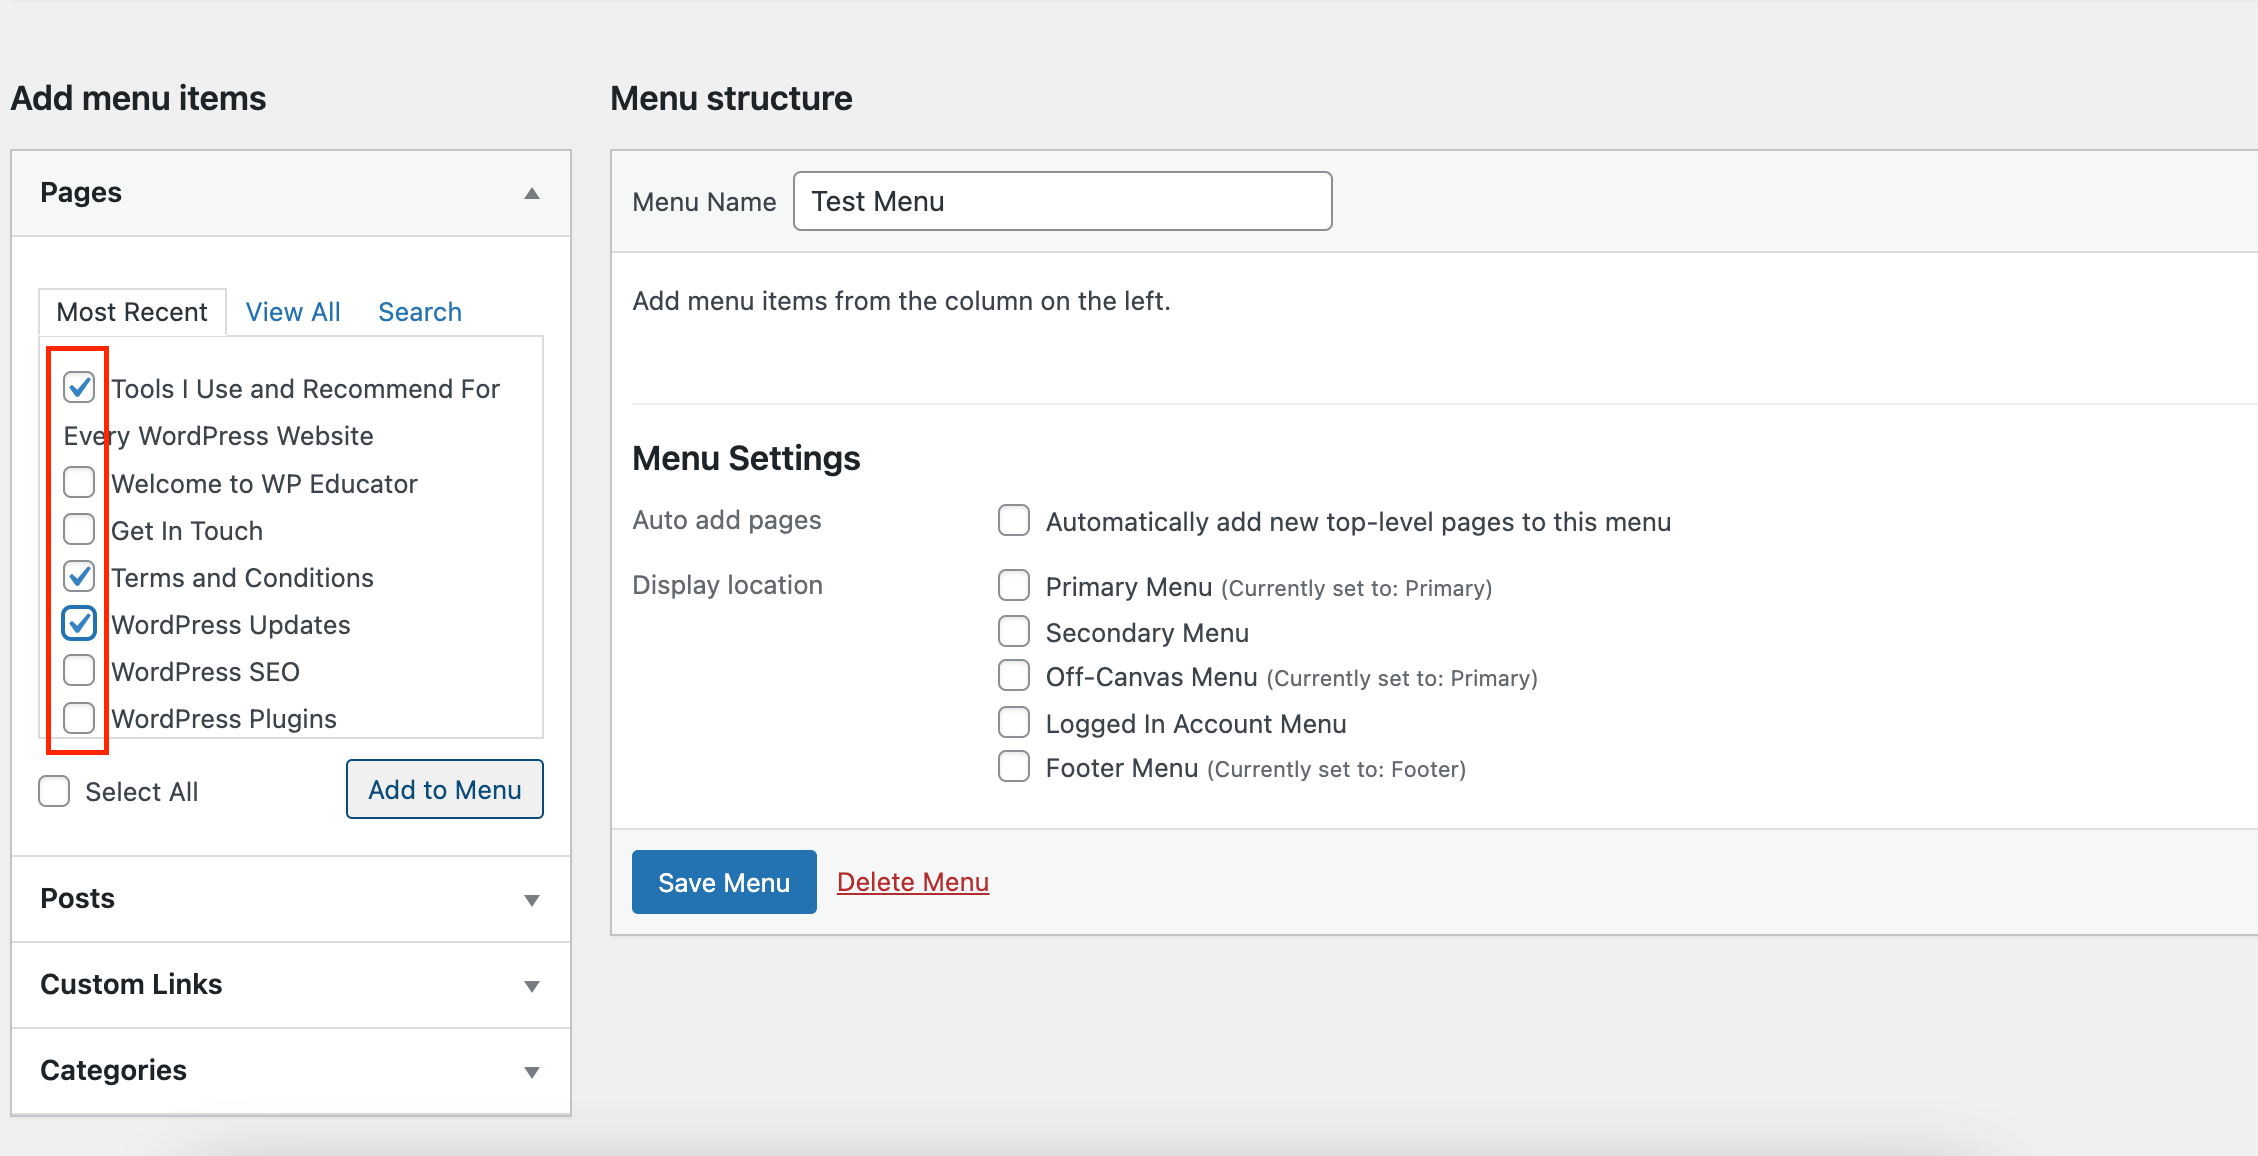
Repeat this process for the rest of the drop-down boxes.
Once your menu structure is complete, click the “Save Menu” button.
WordPress makes it simple to customize your navigation to fit your website’s needs.
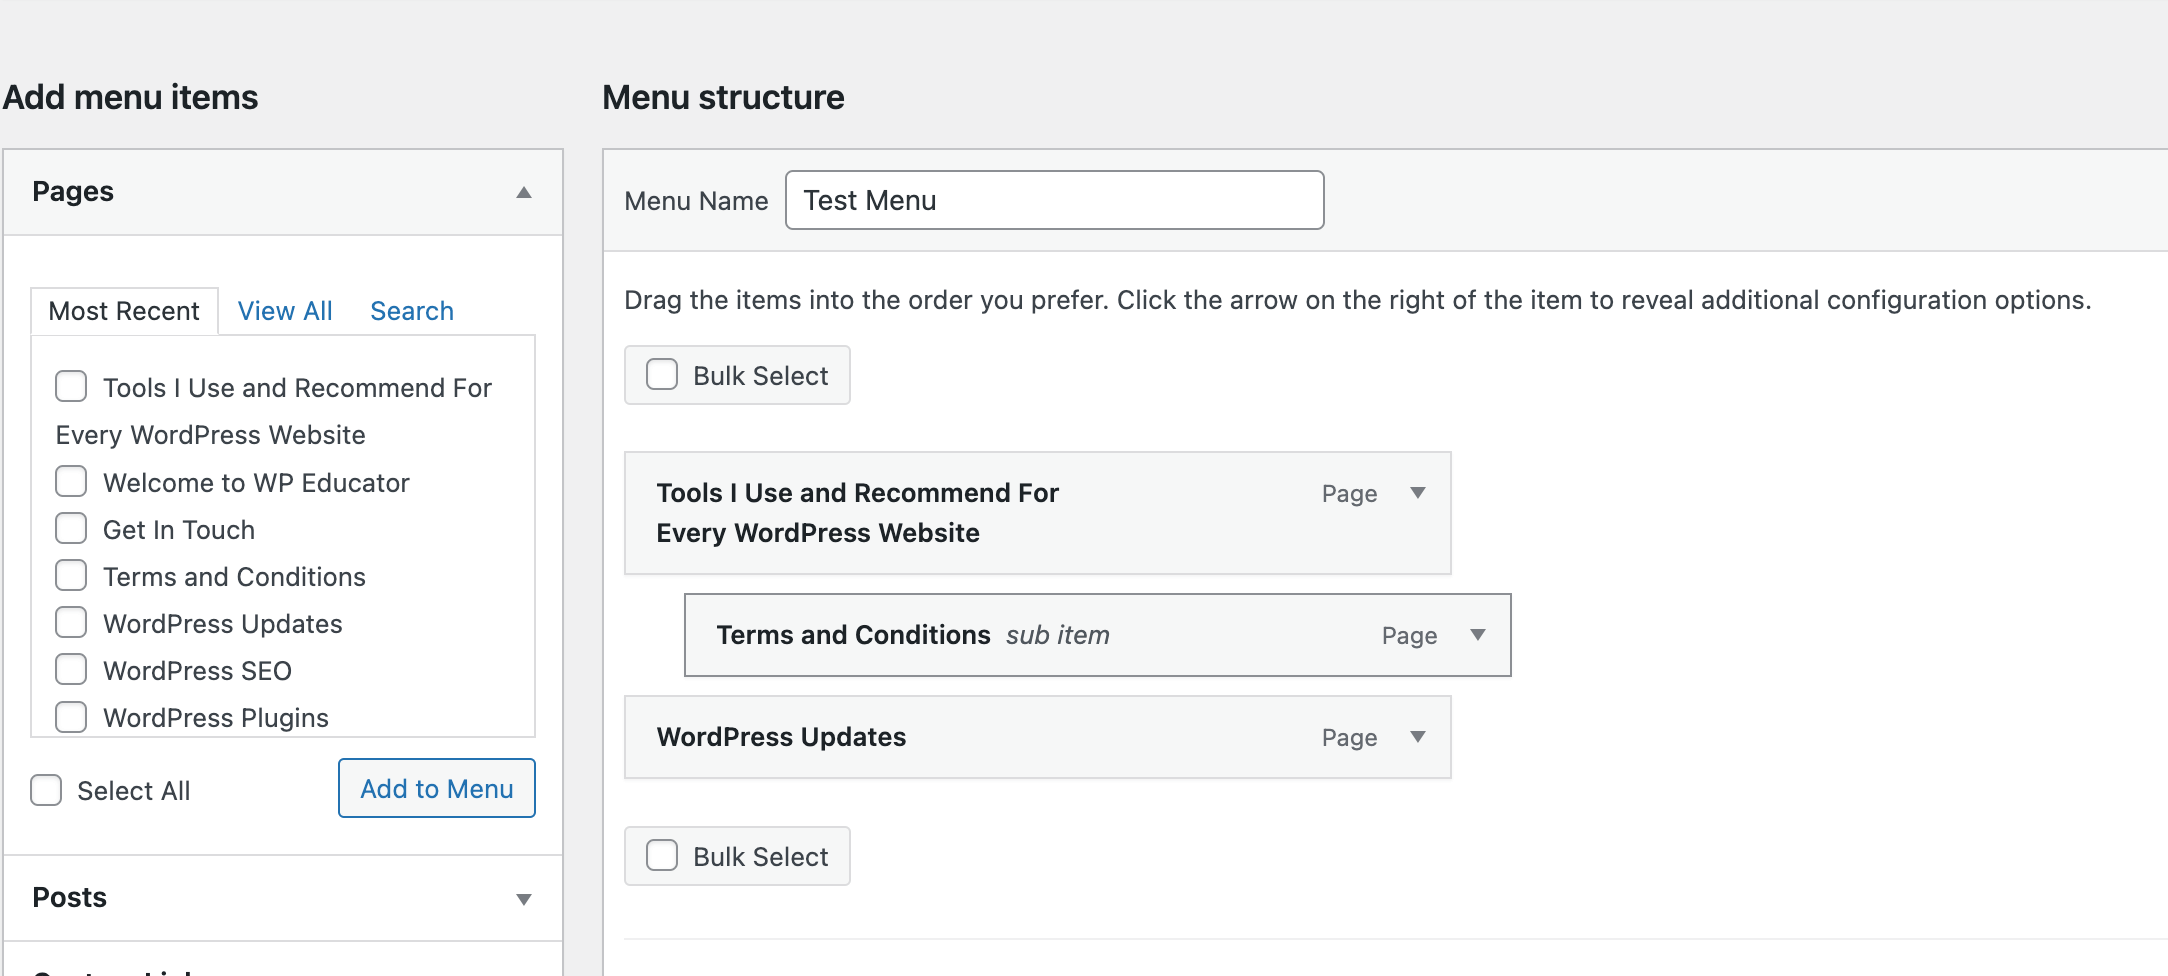
Step 5: Organize Your Menu Items
Once you have added the items, you can rearrange the order.
Place your mouse over it, and a drag-and-drop cursor will appear. With this, you can position the item wherever you want.
You can add drop-down items by dragging an item slightly to the right under another menu item. It will appear indented.
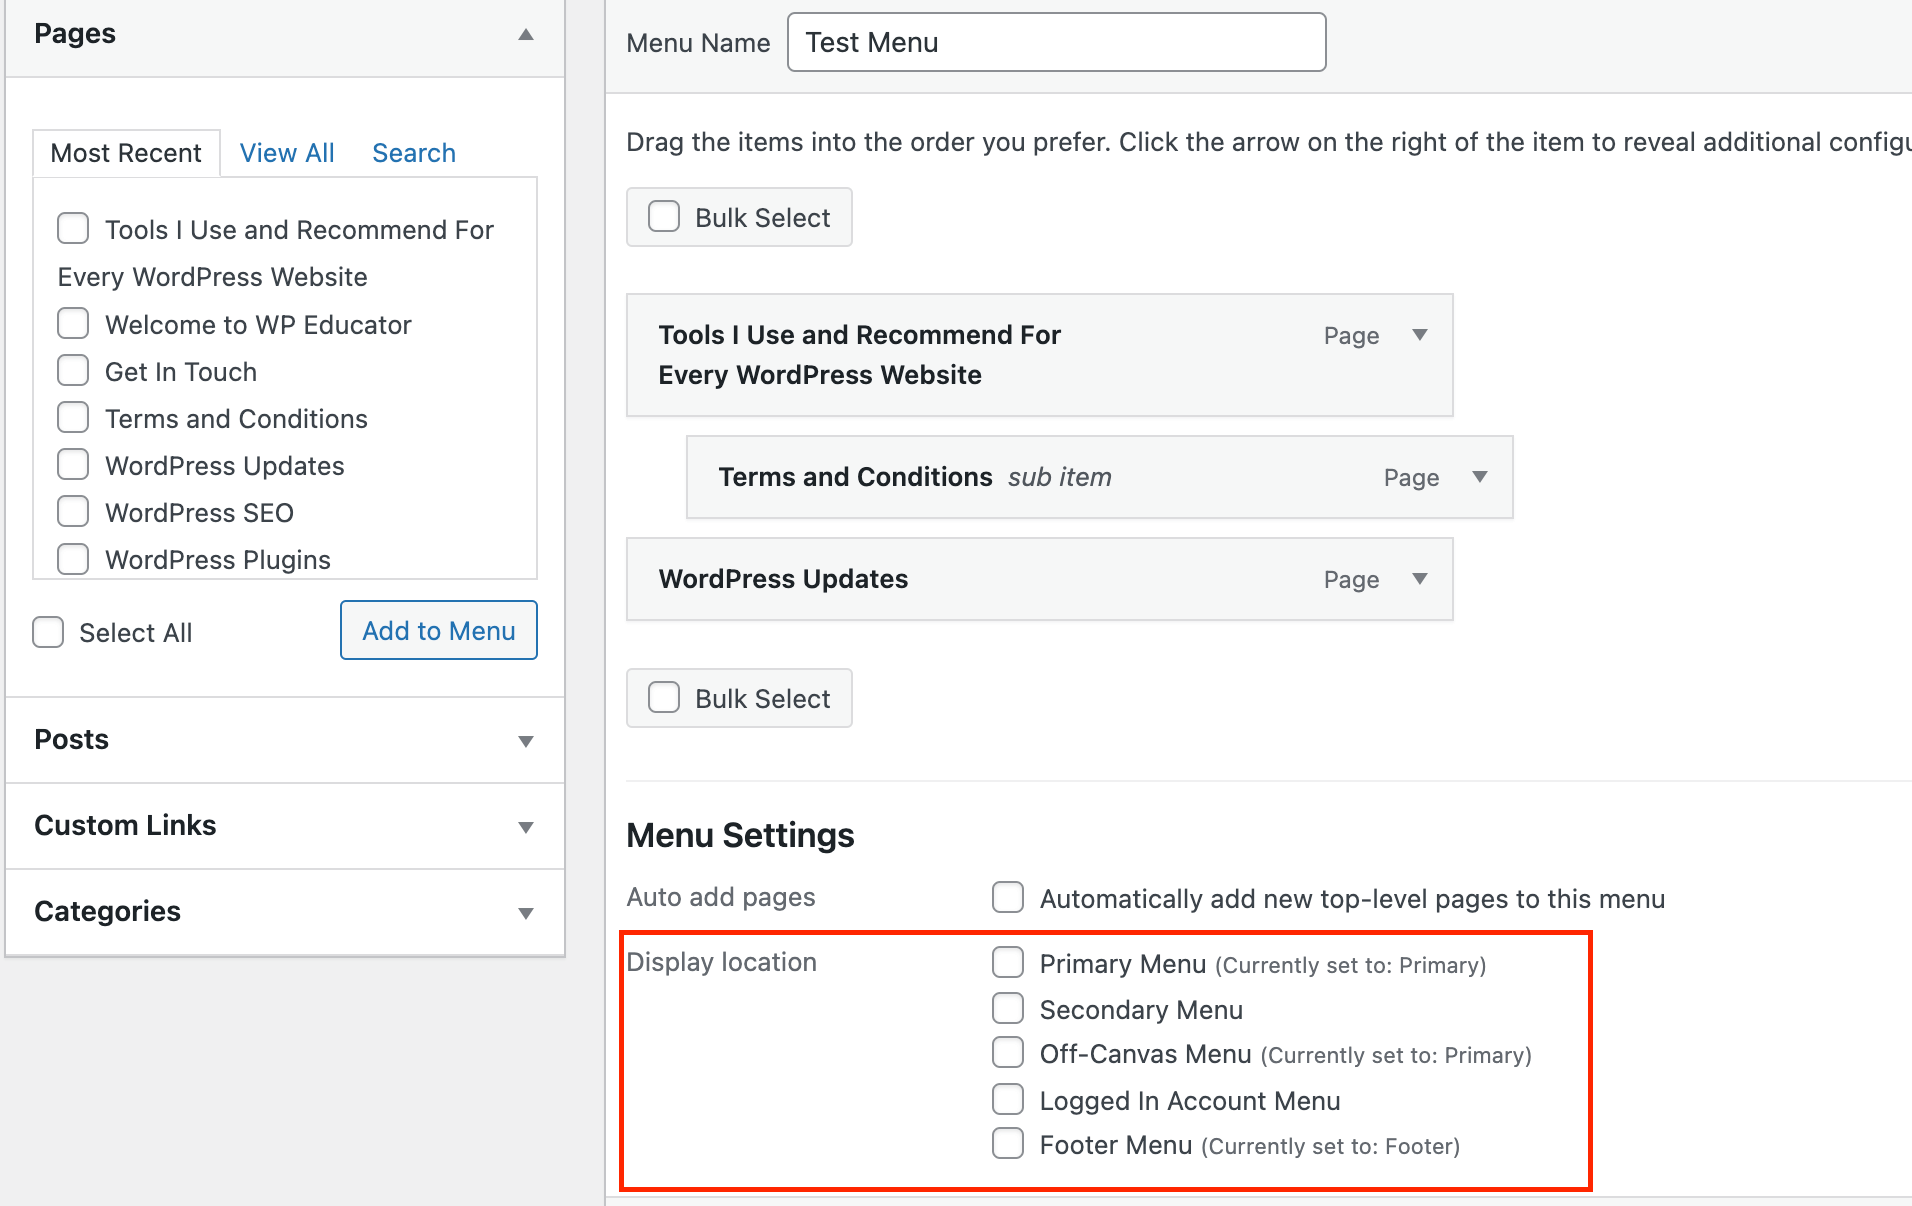
Step 6: Set Menu Location
Now that the menu is complete, you must assign it a location. The location will depend on your theme.
You can choose where you want to show the menu on your website, such as in the header, footer, or sidebar. Different themes may offer varying locations for menus. Select the one that best suits your website layout.
If the preferred location isn’t available in your current theme, you must consider customizing or changing the theme. If both are not an option, you can use an add-on in the page builder to create a custom location for your menu.
Conclusion
Creating menus in WordPress is very easy. Make sure to use descriptive labels and divide the items into different categories. Follow the steps outlined in this guide to create a user-friendly navigation experience.